Tuesday, August 6, 2013

These are the models I intend to build next.  The kits are still collecting dust, but I'll get to them, one model at a time.


Semroc Orbital Transport : I had one of these kits as a kid, I intended to build it after I completed the Andromeda, but of course that took me 35 years to complete.  The original Estes kit is somewhere in my Dad's basement, but I can't find it to save my life. So I bought the Semroc clone kit. I'm going to put an altimeter in the main booster and the glider.


DynaStar Lexxjet:  I just like the looks of this design, and it uses big, powerful composite motors!


Estes EPM-010: I just like the design of this rocket - the forward swept fins with the pods, and the hot red racing design. It already has a payload section too!


Estes Der Red Max: It's about time I made and flew one of these classic kits. I've seen them fly, and they fly well. My Estes kit comes with a black jolly-roger parachute!


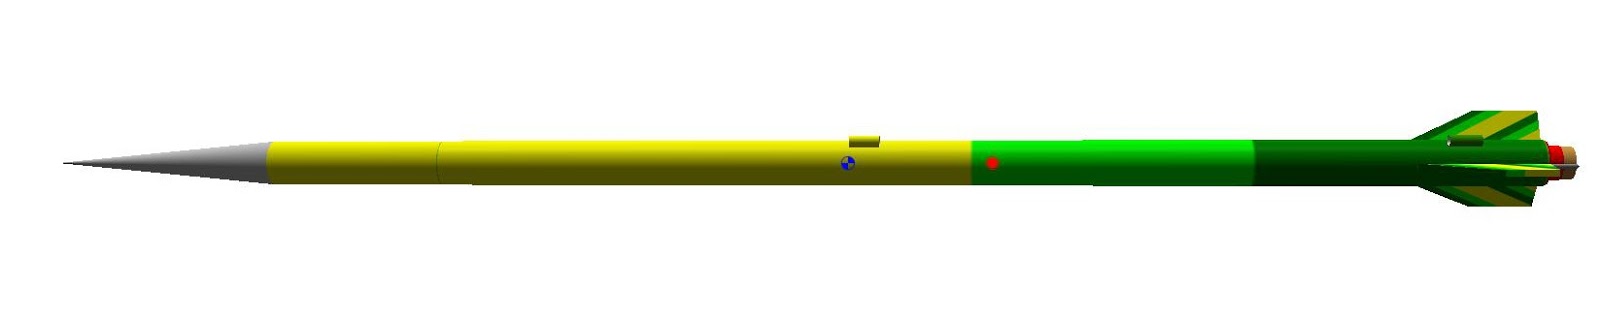
Quest Navajo AGM: I always liked guided missile designs, and this has two stages!


Quest Lil' Grunt: The USA's answer to the Red Max, this uses big D motors and should really fly high!


New Way Space Models N-20 Demon: I could use another square rocket.  I may also turn this payloader into a camera carrier. It has a strong body tube and it is D-powered. The flat sides should make it easier to install a glass window for the camera, like I did with my C-Thru from New Way.


Estes Space Eagle:  Not sure why I bought this, I suppose mostly because it has a payload section in it and I didn't want to leave the hobby store without buying something.


Quest Zenith II:  Another hobby store purchase. After having built a few Quest kits, I thought it would be a decent flyer. Also, it has a payload section already, and it is a two stage model - should be fun.


Quest Space Shuttle Intrepid (less the glider): I got a whole collection of rockets at a great price on eBay (Comanche 3, Striker AGM, Black Diamond, Gamma-Ray, X-15). I have built them all by now except for this one, which for some odd reason all the parts for the glider are missing. I guess somebody lost their glider and wanted to build a new one. I will build the booster anyway, but I need to do something to jazz it up a bit - maybe tube pods and a snappy paint scheme?  I suppose I could craft some kind of glider if I really felt the desire.


Estes Andromeda: I have a second kit from the 1970's because my brother got me one for Christmas, not knowing I had one already. I'll build this one too, but I need to make it different some how. I was thinking making this one pure white, but I'll need to do something about the white decals which won't show up.  Maybe I can go light gray, or paint black or gray squares behind the white decal locations, or maybe hand-paint some of the white stuff. Plenty of time to figure that one out.


Fliskits Borealis: I have to say most of the Fliskits just look a little to odd and quirky to me, but this design blew me away, and I had to buy it right away out of fear that it would be discontinued somehow. I'm going to have to use metalic paints on this dog.  I appreciate that it is one of the more powerful Fliskits out there, they make a lot of low-power stuff.


Estes Mega Mosquito: Well, my original Mosquito is too small to launch because I can never find it, so I had to do something, and this upscale may be the answer. This is another big D-powered model, so I should have alot of fun with it.


Estes Mosquito (just because it came free with the Mega Mosquito): I suppose I will build another one of these, since it was free. I'll have to paint it bright silver or red or orange or something, or perhaps convert it to something larger?  Maybe I can get the Mega Mosquito to launch this one from it's nose.


Estes Mini Honest John: This should make a fun little sport rocket. I might go with the black-white paint scheme shown in some older Estes catalogs. It would look more "Nike-X-like".


Estes Nova Payloader:  What can I say, it's another payloader. I like the red/white colors and the fin shape.


Estes Hornet:  I don't know why I bought this, but it should be a simple, light and fast high-flier. Sometimes I just don't want any frills.


Estes Patriot M104: Another scale model. I suppose the colors appeal to me. Also appealing, the wide body tube will make it easy to stuff a 'chute in there.  The really small tubes frustrate me.


Estes Payloader II: Just like the Nova Payloader, I like the bold fin shape, the red/white colors, and it has a payload in it already.


Estes Photon Disruptor: Funky design, with the T-shaped fins and narrow motor tube.


Estes Solar Flare: Two stages - with a payload to boot.  I like how the 2nd stage is almost hidden in the design. Maybe I can fool somebody at the club launch. I like that it uses an economical 13mm motor for the upper stage, so I shouldn't worry about this going too, too far up.


Estes Solar Warrior: Not sure what it was about this kit, maybe the metalic-looking blue nose. I built my Ricochet  with metalic blue paint, and it still looks awesome. The small T-tops to the fins and the secondary fins were design elements that caught my eye.  There should be plenty of payload space for an altimeter in there too.


Estes Semi-Scale V2: OK, I know in many ways the V2 (or A2) started a lot of this rocket stuff, but I never liked this rocket because of how it was used. I may paint it just like suggested with the black & yellow checkers, or maybe something totally outlandish, perhaps 1950's futuristic, but I certianly will not paint it to look like the regular German-issued weapon.  Besides, shouldn't I be making a model of Robert Goddards liquid-fueled rockets instead?


If you want to ask why I have all these rocket kits que'd up, it's because I got a great deal (typically 40%)ordering in quantity from AC supply (minumum $100), and paid no shipping charges.  Some of them I got because I have a sick personal goal to have at least one rocket from each page of the Estes catalog (currently working with 2010,11 and 2012).

I figure it will take me at least three years to get all of these models built, maybe five years. It may take another year or two to have them all test flown.

As for some of the other models, like Quest, DynaStar, New Way, Semroc and Fliskits, I just like those models!

Monday, June 24, 2013

Lightning

The Lightning was named after a US clipper ship from the 1800's. It was, like all clipper ships, designed to go fast.  This rocket is an original design, my second one. While this rocket the Lightning wasn't specifically designed for speed only, I incorporated a few design features to enhance the speed of this rocket.

First of all, it has a carved balsa wood boat tail, a taper in the last three inches of the body tube which reduces drag.  I also used a round-tipped nose cone, which also has a slightly lower amount of drag compared to pointy-tipped nose cones. This particular nosecone was hand-made, and has a unique shape that can't be found on stock nose cones. The rounded tip then tapers out into a more parabolic-like shape. It is attached to a three inch payload section and a 11.7 inch body tube, followed by three inches of boattail, so it stands about two feet tall. The fins are swept back, more for looks than anything else.  In theory though, a swept back fin can provide more stability force because that same fin area is further from the center of gravity, so the actual fin area needed would be less and therefore less weight. However, you do need to provide more fin mass just to get that fin area further aft. So I shaped these fins for looks, and to provide three legs to allow the rocket to stand on its own.

The Lightning will use standard 18mm motors, and should just reach over 100 feet on an A8 motor, 300 feet on a B6 motor, and hopefully about 765 feet on an Estes C6 motor, and possibly over 800 feet on a Quest C6 motor. Computer predictions say it could reach a top speed of about 167 mph. It should weigh in at just under 100 grams (about 4 oz.).

Unfortunately, the boattail feaure of this particular design made it difficult to use a spring clip to hold the motor, so I reluctantly accepted that I will need to friction-fit the motor, rather than make a ugly, draggy cutout into the carved balsa boattail. The boattail will also be the only rocket I have built that mates the balsa fin to a balsa body, so we will see how well that particular joint holds up. I'm optomistic.

This being an original or "scratch" model, I don't have the luxury of laser-cut fins. I had to make them old-school style, drawing a template pattern and cutting the balsa by hand, making sure to align the wood grain with the leading edge of the fins.  Like I always do now, the fins were laminated with a thick paper cover to add strength and a smooth surface. The leading edges were rounded and the trailing edges were tapered.


The payload section that holds the altimeter was built in the usual way, by taking advantage of the volume inside a hollow bulkhead made from a tube coupler with a plywood base. While a bit heavier than solid balsa, it saves length and weight of the payload tube.  Another weight saver is using a small loop of Kevlar instead of a steel screw-eye. This time, I just used three small strips of padding to hold the altimeter instead of the usual 100% wrap-around of plastic foam.


Inside the foam padding I used a thin cardboard (or thick paper) tube to hold the altimeter inside. Padding attached to the nosecone will keep the altimeter down in the tube, so I added vent holes in the tube to make sure that the altimeter sees ambient air pressure in flight.  I was pleased to find that this method did save me a few grams of weight, so I may indeed see altitudes approaching 800 feet.


I should show you a few views of the custom nose cone and the boattail next.

The nosecone is sort of a hybrid between a rounded nose which then tails off as though it were a parabolic shape.

The tail section of the Lightning.  The swept fins are attached to the balsa boat tail. Thick fillets have yet to be added.  Just for fun, I also added small dowels to the fin tips, extending about 1/2 inch forward and aft.  I did this partly for looks, and partly to provide a harder "foot" when the rocket is standing on its fins. The tapered balsa tips were fairly soft and would be dog-eared in no time.

Here is a computer rendering showing one possible painting idea of the Lightning.  This was before I decided to add the dowels to the fin tips.


...it should look this good!

By now the Lightning has been primed, sanded, primed and sanded and ready for all the decorative paint. I used a technique I learned from somewhere, priming first with gray and then priming with white.

This allows me to easily see when I sanded off the primer layer so I know when I went too far. More importantly for rockets - which need to be light weight - it allows me to make sure I sand off enough primer. While it doesn't look very good while being finished, it will look good in the end.

In the past I have made some very heavy rockets. Granted, they look good, but flight performance was lacking with all the extra weight of the primer & paint.

With this technique, I have at least one good, thick primer coat, and the second is nearly sanded off, but will remain in the lowest depressions of the finished surfaces.

Next, I painted just the nose cone, payload section and the top part of the body tube with white paint.  The white paint will help make the yellow paint to go on top a bit brighter and look better, since yellow paint does not cover as well as darker colors. You can often still see a little bit of the color underneath the yellow I'm sure.  I learned that lesson with the HD Explorer, where I painted some red over a white base, and glued it to another body tube that was only painted red over the primer. There is a clear difference in the two color hues because of that. I don't want that to happen again with this rocket finish.

The upper part of the tube was painted white also, but in this case it is because I will then mask off a couple of cloud shapes while I paint the rest of the rocket blue and yellow. In the end I should have a cloud shape with yellow lightning bolts - without needing a custom decal.  We will all see how that goes...

Here we have the white painted, then I masked off the cloud shapes and painted yellow. I then masked off the yellow for the lightning flash, and also yellow stripes on the three fins.

With the white and yellow safely behind the masking tape, I can now apply the main blue color to the entire rocket.


Here is a look at the mask for the lightning flash down the sides of the body, with blue paint now being sprayed on.


Now that that is all done, it's time to remove the masking tape and see the results.  It was not pretty.  Sure, the design worked well and the paint was applied and dried well, but I had a lot of trouble peeling off the tape under the paint layers because it was very thin and splitting into tiny shreds.  Finally I had to scrape it off with an X-acto knife, and as a result I gouged out the fins in several places and generally made a mess of the whole thing.  A lot of touch-up painting with a brush and I now have acceptable results if you don't look too close. Next time I will be sure to use THICK tape.

The last step was to apply a few decals, and paint some thin black outlines on the white cloud shape...done!  According to my records (I record everything) it took me a little over a year to complete working off and on. I started it on June 11, 2013.

The final weight of the rocket is 74 grams which does not include the parachute or a motor.  That's not so bad, and I will find out whether I will be able to reach the predicted 788 feet on a C6-5, 329 feet on a B6-4, and 115 feet on an A8-3 motor. At least that is what the Open Rocket software predicted.  My gut says I'll get about 550 on a C6, 210 on a B6, and if it is really that low I will not risk it on an A8 since I think it will be lucky to hit 50 feet.

That will be an interesting contest: Guts vs. computer.  Stay tuned...some weekend with good weather and we will find out!  In the mean time, let's take a closer look at the finished Lightning.


The obligatory "tall" shot:

A closer look at the payload section and nose:

And how about a closer look at those fins, boattail and antenna?


One last big-nose shot:


 SPECIFICATIONS

Length: 24.125 inches, 613mm
Mass (less parachute & motor): 74 grams
Diameter: 1.375inches, 35mm (BT-55)
Number of fins: 3
Altimeter Capable: Yes
Payload Volume: 4.375 cubic inches
Recovery Method: Parachute, 14"
Recovery Protection: Wadding or optional Nomex
Shock Cord Elastic Length: 36"
Shock Cord Mount: Kevlar loop, frayed and glued to body tube.
Fin circular span: 4.075 inches, 103.5 mm
Motor Mount Diameter: 18mm
Motor Length: 70mm
Motor Retention Method: Friction
Motor Power Range: B, C
Nosecone Material: Balsa
Fin Material: Balsa, paper laminated
Special Design Features: Boat tail, Fin-tip antennas
Launch Lug Size: 1/8"
Kit Brand: None, custom design.

 Flight Logs


This model has not been flown yet.

Arroe

The Arroe is an original design.  The goal was to use mini-motors for cost efficiency, yet try to get bigger rocket performance. Since that can't really be done, as there is no such thing as a perpetual motion machine, I attempted to simulate some of the characteristics of larger rockets. So first off, I wanted to make this as tall as practical, so I had to sacrifice diameter to keep it light. The resulting shape began to resemble an arrow, which is how this rocket got it's name.  The long, thin length of the rocket is almost inherently stable, so this design only required small fins, which further added to the arrow resemblance.

Rockets that can only fly with a single size motor are pretty boring, so I would like to have greater power choices for this design.  I therefore hope to at least get this rocket over 100 feet with a 1/2A motor - the smallest I will bother to use.  If I can construct this light enough, it should reach 335 feet on the A3-4 motor, 325 feet on the A10-3 motor, and if those go well, I could reach 118 feet on the 1/2A3-4 motor.  Of course those are all computer simulation numbers, I'll have to adjust the projected performance based on the actual weights of the constructed parts, which usually ends up a bit heavier, especially with paint and glue added. I'll consider this a performance success if I can reach 100 feet on the 1/2A motor.


I started with the nose cone. I didn't have a suitable size of balsa wood block, so I glued two pieces together to form a block with large enough dimensions. When dry, I drilled a hole in the end and inserted and glued a wood dowel to act as a holder while it is being turned & carved to shape.  When finished shaping, I cut the dowel off flush.


Here is a nosecone (a different one actually) being shaped with a sanding block while turning in a drill press. This is a great method for shaping precisely rounded nosecones, but you must make sure not to press too hard or the dowel will break. Also, hold the sandpaper very firmly or it may be out of round, and hold it on the side of the cone that is turing away from you, in case it grabs and throws the sandpaper.
Rather than try to get the fit to the BT-20 body tube perfect, I decided to use a coupler and that allowed me to use the full length of balsa wood for the nosecone shape. The coupler is simply glued on to the flat base of the finished balsa shape, as shown above. In this photo it was only tack-glued. Later I applied a thicker fillet all around the inside.


Here is the finished shape. The glue joining the two halves of balsa is absolutely invisible.  I originally intended to make a simple straight-sided cone shape, but while carving it I decided a bit of a curve would look nice.  This particular nose cone is 4 inches long not counting the coupler, which should stretch this baby to about 2 feet total length.  The last thing I did to this was to dab a bit of CA glue into the tip of the cone, then rubbed it in with wax paper, to let it soak in and harden the tip.

Next I started making the motor mount and then inserted it into a 18" length of tube for the main body.  I cut another 3-1/2" section for the payload tube and used another coupler to join the two.  The coupler will act as a bulkhead, so the base of the coupler had a small  plywood disk attached to the end and a Kevlar string loop was attached to act as the parachute attachment point.

Now the only thing left to do is to make and attach the fins and launch lug, parachute and shock cord. It was a very simple build so far. Painting is of course optional but something I simply have to do.

In a departure from my other rocket builds, these fins are so small I decided not to laminate them with a layer of paper.  They are small enough that they are unlikely to be broken, and I would be balsa filler-coating the edges anyways, so just another swipe or two of the brush and the whole fins are done.

Here I present a proposed paint scheme. This gives you some idea what this beast will look like.
If I stripe the fins in this way, it should give the appearance of a feather fin.  The blue dot shows the center of gravity, and the red dot shows the center of pressure.

Fast forward about a year while life interrupted, and here I have the rocket finished and I now started the painting.  I started with the lightest color (yellow) and painted the payload and upper body tube sections.  I also sprayed a bit of the fins where the yellow stripes will be.  Next, I masked that off and painted the light green in the middle section of the body tube.

Sorry if this is a bit blurry.  While painting the body tube is on a wood dowel that is attached to a larger block of wood.  That's my normal rocket holder when I am working on them.  After I built it I discovered it wasn't heavy enough to absolutely keep the rocket upright, so you see a bit of the heavy C-clamp that hangs on to the wooden base.


After the lighter green, I masked off the whole top of the rocket and sprayed the remainder of the rocket with a darker green.  I learned to use Scotch brand celophane "magic" tape, because I found it seals much better than masking tape and peels off cleaner.  I just have to be sure that the edge of the tape is pressed tightly to avoid leaks.  I also learned the hard way to always leave a bit of a folded-over end so I have something to find and pull off.


This green paint was from an 10-years or so old paint can, and it came out a bit runny.  Getting a good cover ended up taking a lot of coats, and made for a annoyingly heavy finish.  Also, the thicker coating left a fairly thick edge that I'm sure will add some extra drag.  Looks like I won't be finding that 300' mark with this rocket anytime soon.

I did have a lot of trouble with the tape on the fins, so I called an audible and simplified the fin stripes to a single band of light green and yellow.  I also skipped one layer of tape and just hand-painted the light green stripes. I kind of regret that now because I think the original idea would have looked a lot nicer.  I also realized too late that I had some yellow stripe decals that would have looked much nicer and would have been easier than masking and painting.  Live and learn.

Actually it does look nicer than this photo here to the side, for some reason the light green and yellow look the same on here, even though with the natural eye they are clearly two different colors.


I waited a long time between color coats to make sure I didn't have any crazing or other paint formula issues, but the touch-up of dark green only was allowed to dry for a day before I started the decals.

This view shows the "34" that I added.  That's because this is rocket build #34 for me. Most of my rockets have the series number on them if the design allows for it.   Further up above the dark green, there is a silver ring separating the dark green and light green (which again for some odd reason appears yellow).  This ring was from a decal, and not hand painted like I often do.


Here is a much better look at the light green color, which came out in the picture much better.  As you would expect, the "EXPERIMENTAL" is a decal, which is accurate since this is an original design that has never flown.


 Here is another back end view.  The opening here is 13mm, so it will take the smaller 1/2A and A size motors.

In case you haven't realized yet, I am trying to keep you in suspense before revealing the entire rocket, giving you just one little peak at a time.


So let's move on up to the opening for the parachute.  Here we see the small "Quest-like" shock cord, which I prefer over the plain rubber type.  I'm using my new idea in shock cord mounts again, a small piece of Kevlar with the ends frayed and generously glued against the body tube.  Hasn't failed me yet, and makes the replacement of the rubber much easier.  Not too much easier though, because I purposely made sure the Kevlar loop was not long enough to reach the end of the (CA-soaked) body tube, to prevent any chance of zipper damage (not very likely with such a small rocket).


 The other end of the shock cord is attached to another Kevlar loop, this one sticking through a hole in a small plywood disk, where it is also generously glued and knotted.  The Kevlar is lighter than a steel screw-eye, and less likely to break free.  The top side of the plywood disk has a body tube coupler glued on.  This acts as a bulkhead, and holds the payload tube on the other side.

This is what we see on the other side of the bulkhead.  A small bit of plastic foam padding is glued in, and presses against the Altimeter One that is in the payload section.  The bits of masking tape on the coupler helps to keep the tube parts tight so we don't have separation in flight.

Ok, we are almost there.  On the top side of the payload, above the altimeter, we have another piece of plastic foam, when the whole rocket is assembled, the foam is slightly compressed and keeps the altimeter positioned in the tube and prevents it from rattling around in there.  As mentioned earlier, the nose cone is made from carved balsa and the fitting is a tube coupler.  The nose cone is painted silver here (silver being my favorite color for a nose cone).


One more thing I want to show.  The bulkhead will work best if there are equal parts on the payload tube and the lower tube.  When connected together, the bulkhead/coupler is hidden and so I never know for sure if it is centered well.  If one side is too short that can spell failure of the flight or loss of the expensive altimeter.

I usually make a black ring on balsa bulkheads with a sharpie to see that I am attaching the body tubes in the right place.  More recently, I just leave the bulkhead exposed a tiny bit when spray painting, and I get a small ring with no effort whatsoever.

In this picture I separated the two body tubes a bit so you can see where the white primer coat left a small white ring on the coupler, so when assembling the two tubes, I can see that I am roughly in the center.

Last detail picture now.  Here we see two sides of the payload tube.  The tiny static holes are seen about 2/3 up, and there are three of them spaced around the tube.  I used to use a pin/nail to punch them through, then I tried a small drill, but they always left a ragged edge inside.

Now I am using a small punch, and every hole is clean and identical.  I'm pretty sure that can lead to more accurate altimeter readings, and 100% sure that it looks better.

You may recognize the small burnt Fliz kits guy - or is that excelsior? - on the payload decals.  I figured that would be in the spirit of an experimental rocket like this.


Ladies and gentlemen, I would now like to present to you the finished Arroe, rocket #34 from my workshop...(trumpet fanfare)


So there it is.  I will add this to the launch schedule, and we'll see if it can actually fly upwards.  Looks pretty large up there, but remember it's only a 13 mm motor.  I will measure and measure again and give you all the specs, but for now, just admire her beauty!

SPECIFICATIONS

Series Number: 34
Number of Stages: 1
Stock Length: 25.65"
Diameter: 0.736"
Fin Span: 1.6"
Number of Fins: 3
Stock Empty Weight: 30.8 grams
Empty Weight with Altimeter Payload: 37.7 grams
Liftoff Weight Range: 43.7 - 45.6 grams
Motor Diameter: 13 mm
Motor Length: 45 mm
Motor Retention Method: Clip
Payload Interior Length: 3.8"
Payload Interior Diameter: 0.71"
Payload Volume: 1.5 cubic inches
Altimeter Capable: Yes
Recovery Method: Parachute, 9"
Typical Descent Speed: 11mph (estimated)
Recovery Protection Method: Wadding
Shock Cord Mounting: Kevlar
Fin Material: Balsa
Launch Lug Size: 1/8"
Glue Used: Titebond III
Paint Used: Painter's Touch, Testors
Kit Brand: none, original design
Completed: July 12, 2015


FLIGHT LOGS